Raising a toddler over 12 months old means navigating endless snack struggles: store-bought baby cakes loaded with hidden sugar, artificial flavors and preservatives, dry baked muffins that irritate sensitive young digestive systems, and picky eaters who turn their noses up at bland, nutrient-poor complementary foods. If you are a tired parent hunting for a homemade, naturally sweet, soft treat your baby will happily gobble down—without hauling out a bulky oven or stocking up on processed sweeteners—this snow pear steamed sponge cake recipe is your new go-to daily lifesaver.
This gentle steam-cooked cake is crafted exclusively for children aged one year and older, built around simple, clean whole ingredients with zero artificial additives, zero refined sugar and zero heavy grease. The star ingredient, fresh snow pear, delivers subtle natural fruity sweetness that replaces table sugar entirely, while the steaming cooking method locks in moisture and avoids the dry, overly crisp texture of oven-baked pastries that can upset little stomachs. Every bite is ultra-fluffy, tender and melt-in-mouth soft, gentle enough for toddlers with newly sprouted teeth, and light enough to serve as morning breakfast, midday afternoon tea, or a filling post-nap supplementary meal.
Many caregivers worry homemade baby desserts require advanced baking skills or specialized kitchen appliances, but this pear steamed cake eliminates those barriers completely. No air fryer, no convection oven, no complicated pastry tools—all you need is a regular home steamer, basic mixing bowls, a hand whisk and a small blender to whip up this nutrient-packed toddler snack in under 40 minutes total prep and cook time. Below, we break down the full nutritional value of each ingredient, walk through an easy 8-step foolproof cooking tutorial, and share professional pediatric feeding tips to adapt this recipe for your unique child’s dietary needs.
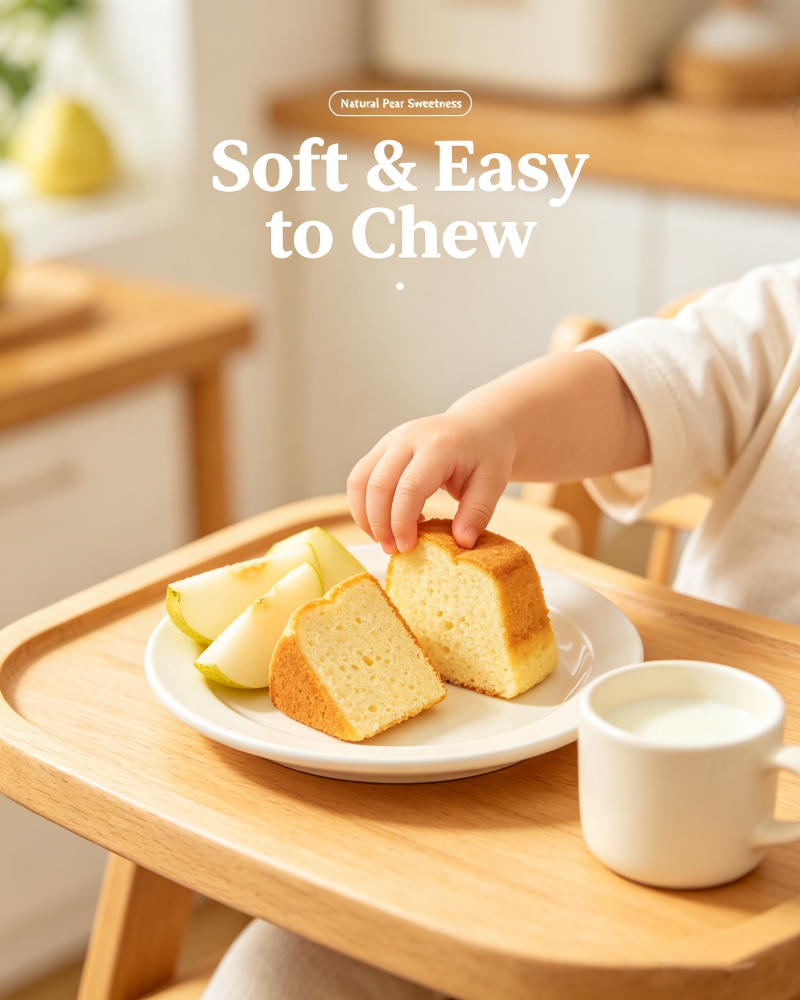
Why Steamed Pear Cake Is Superior to Oven-Baked Snacks for Toddlers
Before jumping into the step-by-step recipe, let’s unpack why steaming is the gold-standard cooking method for baby desserts, and how snow pear elevates this simple sponge cake far above generic egg steamed cakes for infants.
First, steaming creates a moist, tender crumb that is far easier for young digestive tracts to break down. High-temperature oven baking dehydrates cake crumbs, creating dry, crumbly pastries that can cause mild constipation or throat irritation in toddlers with delicate stomach linings. The low, consistent moist heat of a steamer cooks the batter evenly without stripping natural moisture from eggs and fruit puree, resulting in a velvety, dense-yet-fluffy texture that dissolves gently as babies chew, cutting down choking hazards significantly.
Second, steaming avoids the risk of high-temperature chemical reactions that can occur when flour and sugar bake at extreme oven heat. This zero-sugar formula removes refined sweeteners entirely, leaning on snow pear’s natural mild fructose for subtle sweetness, so parents never need to worry about spiking their toddler’s blood sugar or developing premature sugar cravings from store-bought kid treats.
Snow pear itself is a powerhouse fruit for young children’s health, packed with water-soluble fiber to support regular digestion, vitamin C to boost developing immune systems, and gentle cooling properties that soothe minor dry coughs or irritated throats common in toddlers during seasonal weather shifts. Unlike overly sweet apples or citrus fruits that can trigger mild acid reflux in sensitive babies, snow pear’s soft, mild flavor balances egg’s subtle savory taste perfectly, creating a kid-approved flavor profile with no bitter aftertaste.
Every component of this recipe is intentionally chosen for infant nutrition: fresh whole eggs deliver high-quality protein and choline to support brain development, low-gluten flour prevents heavy bloating from dense wheat gluten, and baby formula adds mild creamy dairy nutrients without thick heavy cream or whole milk that may trigger mild lactose sensitivity in some toddlers. A tiny splash of fresh lemon juice stabilizes whipped egg whites without harsh artificial cream of tartar, keeping the cake light and airy with no sour aftertaste.
Full Ingredient Breakdown (Single Serving for One Small Baby Ramekin Cake)
All measurements are kid-friendly, scaled for a single individual baby portion to avoid food waste for small households with one toddler. We list each ingredient’s purpose and nutritional benefit for 1+ year old children:
- 2 Fresh Chicken Eggs: Separate egg yolks and egg whites. Eggs supply complete protein, lutein for eye health, and healthy fats to fuel toddler growth. For babies under 12 months, skip egg whites entirely and bake a yolk-only version to avoid allergen risks.
- 1 Medium Snow Pear (43g Pear Flesh After Peeling & Coring): The core natural sweetener of the recipe, high in fiber and hydration to ease digestion. Choose ripe, soft snow pears for smoother puree with brighter natural sweetness.
- 30ml Toddler Formula Milk: Adds creamy mild dairy nutrition and smooth texture to pear puree; breast milk can substitute formula for families who prefer it. Avoid regular cow’s milk for toddlers under 18 months with mild lactose sensitivity.
- 40g Low-Gluten Cake Flour: Low-protein soft flour prevents tough, dense cake texture; high-gluten bread flour will create rubbery crumbs unsuitable for tiny teeth. All-purpose flour can work as a backup in small quantities.
- A Few Drops Fresh Lemon Juice: Stabilizes egg whites during whipping, prevents egg yolk oxidation, and balances faint egg odors without adding sour flavor. Bottled lemon juice works in a pinch, but fresh juice delivers cleaner taste.
No hidden sugar, no baking powder, no artificial flavorings, no oil, no salt—this minimal ingredient list lets parents feed their toddlers with total transparency, ideal for families prioritizing clean, additive-free complementary foods.
Step-by-Step 8-Step Foolproof Cooking Tutorial
This visual 8-stage guide follows the infographic workflow exactly, with parent-focused pro tips embedded in every step to eliminate common cake failures like shrinkage, dense crumbs, or deflated batter mid-steam.
Step 1: Full Ingredient Preparation (5 Minutes Prep)
Start by measuring and portioning every raw ingredient first to avoid rushed mid-cooking measuring errors. Peel the snow pear, cut away all tough core seeds, and dice the soft white flesh into small uniform cubes to simplify blending later. Separate egg yolks and egg whites into two completely oil-free, dry mixing bowls—even a tiny trace of yolk fat in egg whites will ruin whipped foam structure, leading to flat, dense cake. Set out low-gluten flour, measured formula milk, and a small lemon for juice extraction.
Parent Pro Tip: Double-check all bowl and whisk surfaces for residual grease before separating eggs; grease is the top reason egg whites fail to whip into stiff peaks for fluffy steamed cake.
Step 2: Make Smooth Snow Pear Puree (3 Minutes Blending)
Add pre-diced 43g snow pear cubes and full 30ml formula milk into a small baby food blender. Blend on high speed for 60 to 90 seconds until the mixture turns silky, lump-free liquid puree with no solid pear chunks remaining. Chunk-heavy pear puree will weigh down batter and create uneven dense pockets in the finished cake. Once blended, set the pear puree aside for mixing with egg yolks later.
Step 3: Mix Silky Egg Yolk Batter
Pour the full batch of pear puree into the bowl holding two separated egg yolks, and stir gently with a silicone spatula to fully combine liquid and yolks. Sift 40g low-gluten flour through a fine mesh sieve into the yolk-pear mixture—sifting flour eliminates hard dry flour clumps that create grainy cake texture. Fold the batter slowly with a silicone scraper, mixing only until the batter flows smoothly like thin yogurt with zero visible dry flour particles left. Do not over-stir, as excessive mixing activates wheat gluten and creates rubbery cake crumbs.
Step 4: Whip Stable Stiff Peak Egg White Meringue
Take the bowl of clean egg whites and place it in the freezer for exactly 10 minutes to chill—cold egg whites whip taller, more stable foam that resists deflating during folding. After 10 minutes of chilling, remove the bowl and drop several tiny fresh lemon juice droplets into the whites. Use an electric hand mixer to whip on medium-high speed continuously until thick, glossy stiff peaks form: when you lift the whisk straight upward, a sharp, upright egg white peak holds its shape without drooping over. Soft floppy peaks will result in a flat, compact cake that shrinks heavily post-steaming.
Critical Parent Tip: Never add sugar to egg whites for this baby recipe—snow pear puree provides all needed sweetness, and refined sugar overstimulates toddler taste buds.
Step 5: Gentle Fold-In of Meringue to Preserve Air Fluff
This stage determines whether your cake rises light and fluffy or collapses flat, so slow, careful folding is non-negotiable. Scoop one-third of the stiff egg white meringue into the pear egg yolk batter bowl. Use the silicone spatula to cut straight down the center of the batter, scrape along the bowl bottom, and fold batter upward over the meringue in slow circular motions to retain trapped air bubbles. Once the first third blends evenly without visible white streaks, pour the remaining two-thirds of meringue into the batter bowl and repeat the same bottom-up folding motion until the entire batter is glossy, pale yellow, light and bubble-rich with no separated egg white streaks left. Avoid rapid stirring or circular mixing, which pops air bubbles and ruins cake lift.
Step 6: Prep the Steaming Ramekin Mold
Select a small heat-safe ceramic baby ramekin with two side handles (the pictured ribbed ceramic baking bowl works perfectly). Pour the fully folded fluffy batter into the empty ungreased ramekin, filling the bowl roughly 80% full—leave 20% empty space for batter expansion as it steams and rises. Once poured, hold the filled ramekin 3 inches above your countertop and tap it firmly down two or three times to release large trapped air bubbles hidden inside the batter; unremoved air bubbles create big unsightly holes throughout the finished cake crumb. After tapping smooth, cover the top of the ramekin tightly with its matching ceramic lid or a layer of food-safe plastic wrap—do not poke steam vent holes in the covering. Sealing the batter fully stops condensed steamer water droplets from dripping onto the cake surface and creating soggy, collapsed indentations on top.
Step 7: Slow Steaming to Lock Fluffy Texture
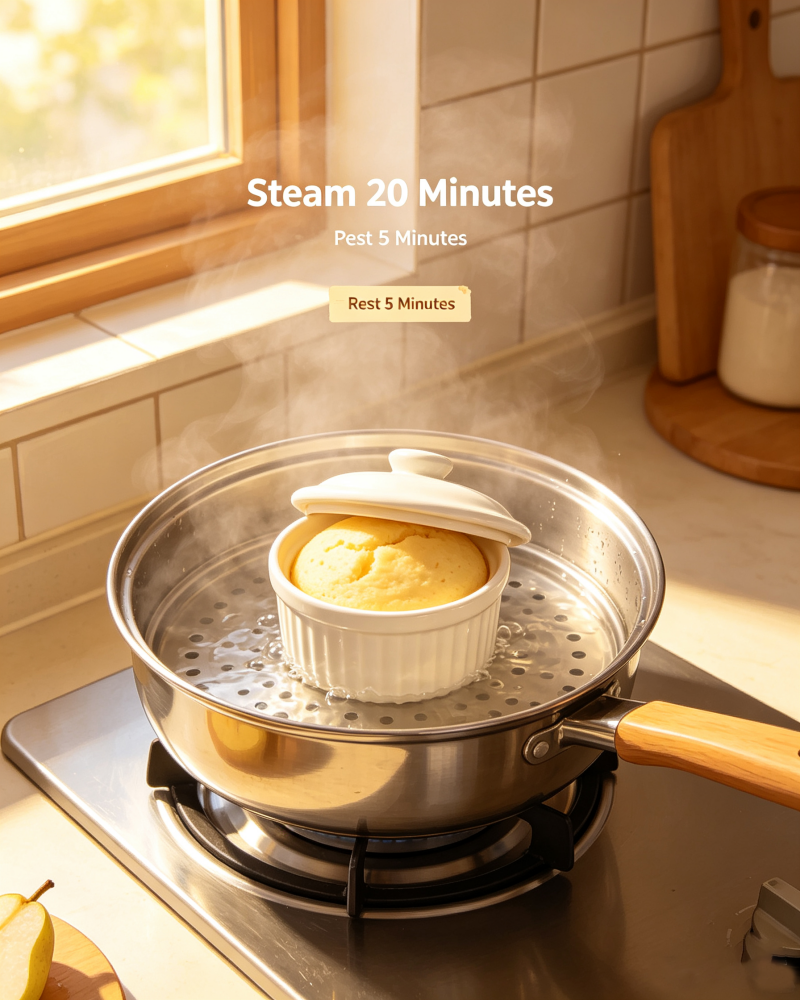
Fill your home steamer pot with water and bring the liquid to a full rolling boil over high heat first. Once the water reaches a steady boil, carefully place the covered batter ramekin onto the steamer rack inside the pot, close the steamer lid, and maintain maximum high heat for a full 20 minutes of uninterrupted steaming. After the 20-minute timer finishes, turn off the stove heat completely and leave the steamer lid closed without lifting it for an additional 5 minutes of resting time. This critical post-steam rest period prevents drastic temperature shock that makes the warm cake shrink rapidly, cave in, or collapse flat the second you remove it from steam.
Many new parent baking failures happen here: lifting the steamer lid early or skipping the 5-minute rest leads to ugly shrunken cake, so stick strictly to the timed steam and rest cycle for perfect fluffy results every time.
Step 8: Unmold & Serve the Finished Pear Steamed Sponge Cake
After the 5-minute post-steam resting window, remove the ramekin from the steamer rack and peel back the covering lid or plastic wrap. Flip the warm cake gently onto a small ceramic serving plate; the soft steamed cake will slide cleanly out of the ribbed ceramic bowl with no sticking. Slice the cake into small thin wedges sized for tiny toddler hands to grip independently during self-feeding. The finished cake boasts a tight, uniform soft crumb with a faint natural pear aroma, subtle creamy milk flavor, and zero overpowering sweetness that overwhelms young palates.
Custom Feeding Tips for Different Toddler Ages & Dietary Needs
This base pear steamed cake recipe can be safely adjusted to match your child’s age, allergy sensitivities, and taste preferences, with clear guidelines split by infant development stages:
- Babies Younger Than 12 Months (Under 1 Year Old): Fully remove egg whites from the recipe entirely, only use two egg yolks to eliminate raw egg white allergen risks for untested infant digestive systems. Skip all fruit puree sweetness if your pediatrician recommends low-fruit supplementary foods for sensitive digestion.
- Toddlers Aged 1 Year and Older: The full original recipe is completely safe, with no added sugar. If your child prefers slightly sweeter flavors after regular exposure to mild fruits, you may add a tiny extra 10g snow pear to the puree batch for subtle extra natural sweetness—still no refined sugar allowed.
- Gluten-Sensitive Toddlers: Swap standard low-gluten wheat cake flour for certified gluten-free rice cake flour to eliminate wheat protein exposure while retaining soft cake texture.
- Lactose-Sensitive Babies: Replace toddler formula milk with unsweetened oat milk or pure breast milk to remove dairy from the ingredient list without disrupting batter smoothness.
- Picky Eater Adjustments: Fold a tiny handful of steamed mashed banana or steamed apple puree into the pear mixture to layer mixed fruit flavors and boost nutrient variety for toddlers who refuse plain pear snacks.
We also recommend serving this steamed cake in specific daily feeding windows to align with toddler digestion cycles: a small wedge for morning breakfast paired with formula or breast milk, a single thin slice as an afternoon nap-time snack, or a small serving after light savory lunch as a mild sweet supplementary treat. Avoid serving the cake right before bedtime, as the mild fruit fiber may create mild digestive activity that disrupts toddler sleep for sensitive children.
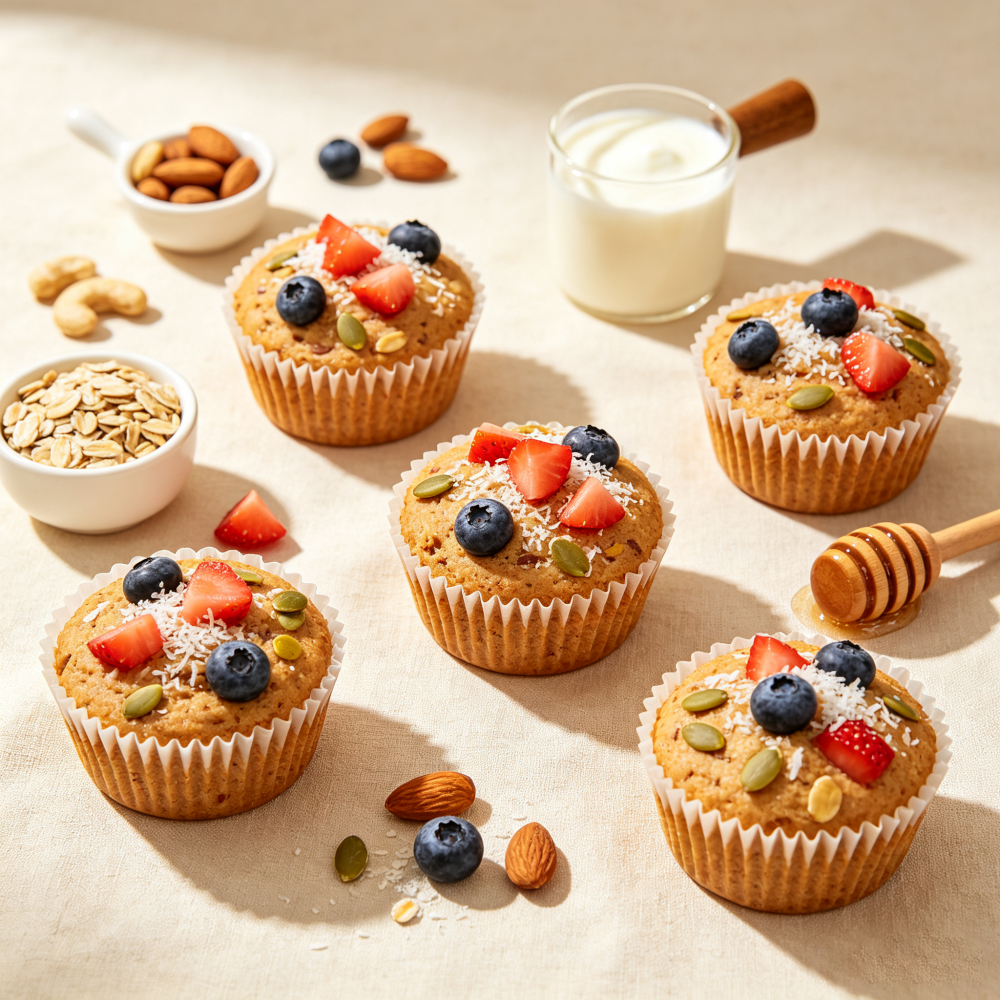
Why This Homemade Snack Beats Store-Bought Baby Cakes
Walk down any grocery store baby food aisle, and you will find pre-packaged sponge cakes, rice cakes and toddler biscuits lined with cane sugar, corn syrup solids, artificial vanilla flavor, preservatives like potassium sorbate, and refined vegetable oils that offer minimal nutritional value for growing children. Most commercial baby cakes prioritize long shelf life over gentle digestibility, creating dense, overly sweet snacks that train toddlers to crave intense artificial sweetness early in life.
This DIY pear steamed cake eliminates all those downsides in one simple homemade recipe: every single ingredient serves a nutritional purpose for toddler growth, sweetness comes exclusively from whole fresh fruit, no synthetic preservatives extend shelf life, and the moist steamed texture supports gentle digestion instead of irritating sensitive young stomachs. For busy parents who value transparency in their child’s food, mixing a small single-serve batch of this cake takes less than 40 minutes total, far faster than a trip to the supermarket for processed kid snacks—and far more affordable long-term than repeatedly purchasing single-use packaged baby treats.
The versatility of this recipe also makes it a staple for busy multi-tasking caregivers: you can batch-blend extra pear puree and store sealed in the refrigerator for up to 48 hours to cut prep time on future cake batches, and leftover finished steamed cake can be wrapped tightly in food-safe plastic wrap and refrigerated for up to 2 days for quick grab-and-go toddler snacks on busy weekday mornings or family outings. Always reheat refrigerated cake slices in the steamer for 2 minutes before serving to restore the original soft, fluffy texture after cold storage.
Final Closing Thoughts: Simple, Wholesome Toddler Snacking Made Accessible
Finding balanced, naturally sweet homemade snacks for 1+ year old toddlers rarely feels easy—many nutritious dessert recipes demand specialty baking gear, complicated multi-hour prep work, or endless hard-to-source specialty ingredients that clutter kitchen pantries. This snow pear steamed sponge cake bridges the gap between nutrition, ease of preparation, and kid-approved flavor without compromise, removing the stress of oven baking, sugar measurement, and complex pastry technique for time-strapped parents.
Rooted in gentle steaming cooking logic and clean whole-food ingredients, this recipe delivers a soft, fluffy, digestible snack that supports toddler immune health, digestive comfort, and balanced taste development without artificial additives or processed sweeteners. Whether you are a first-time parent testing your first homemade complementary food dessert, or an experienced caregiver hunting for new easy snack rotation ideas for your picky one-year-old, this no-oven pear steamed cake will quickly become a permanent staple in your weekly baby meal prep routine.