Nothing beats a warm, crispy slice of golden‑baked toast first thing in the morning. Store‑baked flavored toast can often be overly sweet, greasy or filled with extra additives you would rather avoid. If you are craving rich, milky, aromatic baked toast, making your own toast glaze at home is one of the most simplest home baking projects you can try. This easy homemade toast coating recipe requires basic pantry ingredients, takes just 10 minutes of active preparation time, and works perfectly with regular white sandwich bread. In this complete guide, we will break down every detail, from ingredient measurements, kitchen supplies, step‑by‑step mixing, brushing, baking, professional cooking hacks and smart semi‑finished food storage ideas, so you can create this popular toast simply every single time.
Make Your Own Toast Glaze for Baked Toast
Plain white sliced bread is soft and mild‑flavored on its own. Once toasted, it can easily turn dry and bland. A well‑balanced toast glaze is what completely transforms basic bread into a flavorful treat. This special milk‑honey coating delivers deep milky sweetness, a subtle honey aroma and a satisfyingly crisp outer crust after high‑temperature baking. Sprinkled black and white sesame seeds add extra nutty flavor, texture contrast and visual appeal to every toast slice.
One of the biggest advantages of this recipe is full control over your ingredients. When you mix your own glaze, you can adjust sweetness levels, control oil quantity and skip artificial preservatives found in commercial baked snacks. It is also extremely time‑efficient. The active mixing work takes less than ten minutes. Once you have brushed your bread slices, baking only takes 6‑8 minutes. This recipe is perfect for quick weekday breakfasts, afternoon tea snacks, weekend brunch treats and light homemade desserts. You can even prepare glazed bread ahead of time and freeze it as ready‑to‑bake semi‑finished breakfast food, cutting down your morning cooking workload dramatically.
Full Ingredient Breakdown
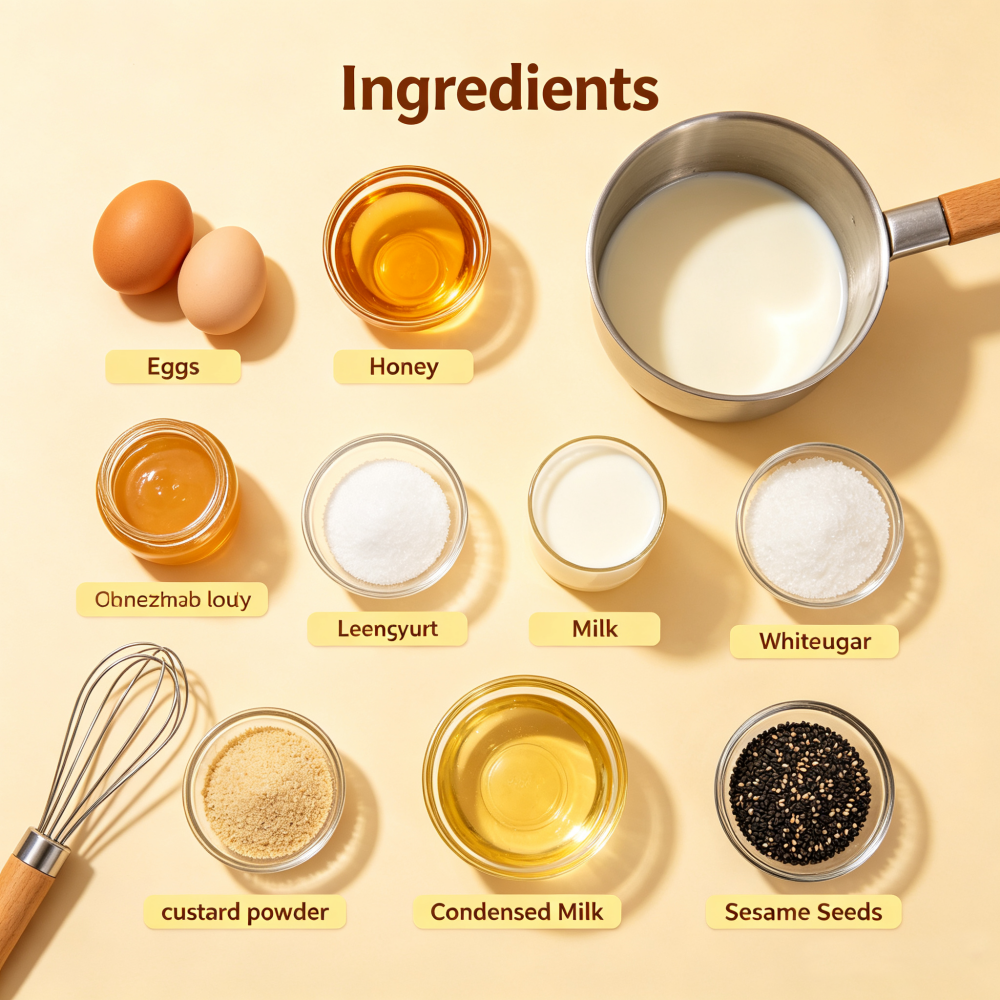
This recipe yields enough toast glaze to coat multiple slices of original plain sandwich bread. Below is the exact ingredient list and the purpose of every component, so you understand how each element impacts your final baked toast result.
- Chicken Eggs (5 units): Eggs form the thick, stable base structure of your toast glaze. They help the liquid coating stick firmly to bread slices, create a smooth texture and produce that beautiful golden yellow color after baking. Eggs also boost the rich, custard‑like milky taste of your finished toast.
- Custard Powder (8 grams): Custard powder, also known as 吉士粉,adds warm vanilla‑custard aroma, enhances golden color development during baking and slightly thickens your glaze liquid, preventing it from running off the surface of your bread.
- Honey (60 grams): Honey brings natural, floral sweetness to your mixture. Compared to pure white sugar, honey delivers deeper, more layered flavor and helps your toast develop a lovely caramelized golden crust under high baking heat.
- Sweetened Condensed Milk (140 grams): Condensed milk is the key ingredient responsible for the strong, creamy milky fragrance of this baked toast. It adds rich dairy sweetness, softens the overall flavor profile and creates a sticky, delicious glaze that caramelizes wonderfully in the oven.
- White Granulated Sugar (25 grams): Fine‑grained white sugar balances overall sweetness, complements honey and condensed milk and speeds up surface browning during baking.
- Cooking Vegetable Oil (200‑250 grams): Vegetable oil lubricates your glaze mixture, keeps your baked toast surface moist rather than dry and brittle, and creates a wonderfully crispy outer layer. You can fine‑tune oil amounts based on your taste preference: 200 grams of oil results in a lighter, fresher‑tasting toast, while 250 grams creates richer, more fragrant baked results. Neutral‑flavored oils like sunflower oil, canola oil or corn oil are ideal choices.
- Black & White Sesame Seeds (one handful, appropriate amount): Sesame seeds provide nutty flavor and crunchy texture contrast against soft toast. Mixing both black and white sesame seeds also creates an attractive speckled appearance across your golden‑brown bread surface.
- Main Ingredient: Plain Sliced White Bread: Standard pre‑cut sandwich loaf bread works perfectly. You can make as many or as few slices as you need, brushing your homemade glaze evenly over each side.
Kitchen Tools & Equipment You Will Need
You do not need professional bakery‑grade gear to complete this recipe. Common household kitchen supplies are more than sufficient:
- 1 Stainless‑steel mixing bowl: Large enough to hold eggs and all wet glaze ingredients while mixing.
- 1 Digital kitchen food scale: Highly recommended to measure every ingredient accurately. Precise weight measurements guarantee consistent glaze sweetness and texture for every batch.
- 1 Manual whisk or a pair of chopsticks: For thoroughly stirring and blending your toast glaze mixture until completely smooth.
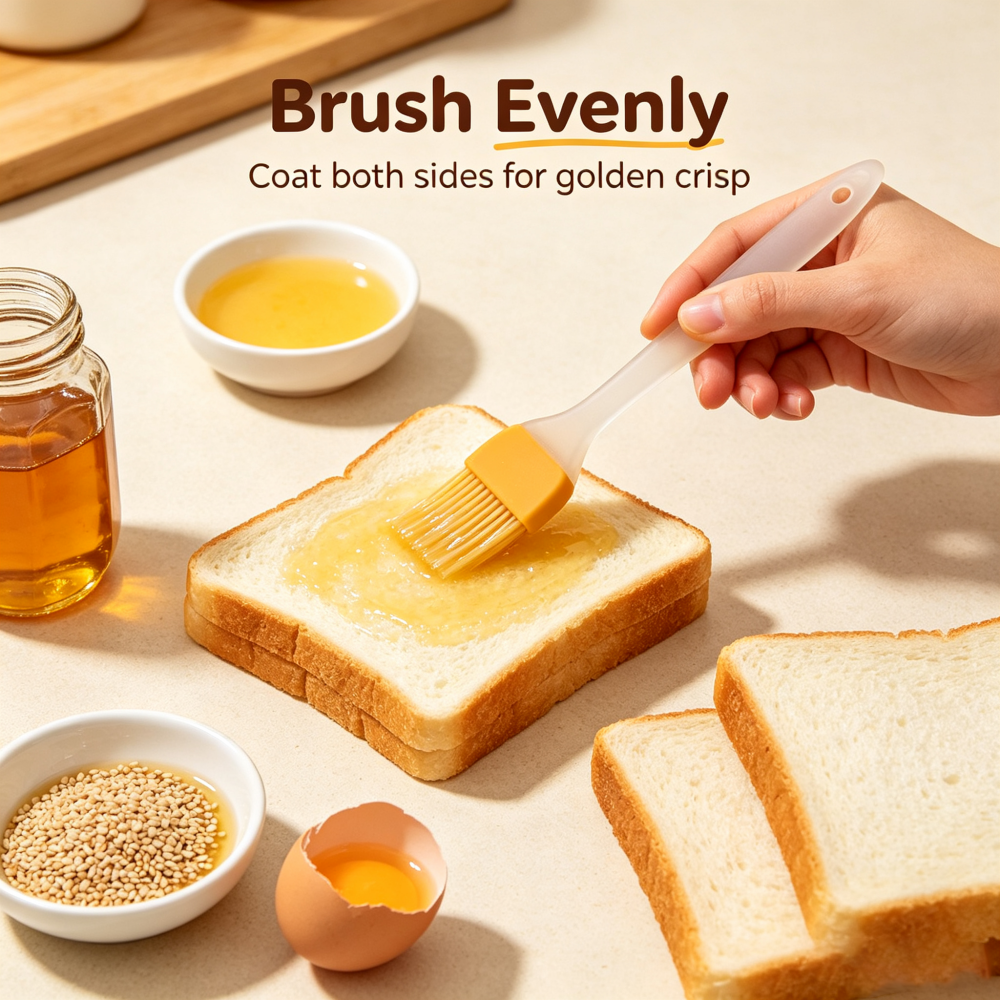
- 1 Silicone pastry brush: The best tool to spread your liquid glaze evenly across both sides of every bread slice. Silicone brushes are heat‑resistant, easy to clean and do not shed loose bristles onto your food.
- Measuring spoon set: For small, precise measurements of custard powder, sugar and sesame seeds.
- Baking rack or oven tray: A wire baking rack is preferred, as it allows hot oven air to circulate fully underneath your toast slices. This helps both top and bottom surfaces brown evenly. If you do not own a wire rack, a regular flat baking tray lined with parchment paper will work as a simple substitute.
- Oven, air‑fryer or table‑top baking grill: Any of these baking appliances will successfully cook your glazed toast. You will simply adjust temperature and cooking time slightly according to your machine’s power level.
Step‑by‑Step Making Instructions
Follow these six clear stages to create perfect sesame baked toast with your fresh homemade glaze:
Step 1: Crack and prepare your eggs
Take your large stainless‑steel mixing bowl, crack all five whole eggs carefully and drop them into the bowl. Try your best to avoid getting small fragments of eggshell inside your mixture. At this stage, you do not need to beat the eggs fully yet; you will combine them with your remaining ingredients first.
Step 2: Add all dry and sweet supplementary ingredients
Add your pre‑measured 8 grams of custard powder, 60 grams of honey, 140 grams of sweetened condensed milk and 25 grams of white granulated sugar directly into the bowl on top of your raw eggs. Now grab your whisk or chopsticks and begin stirring all these components together. Keep stirring until the custard powder dissolves fully, and you no longer see separate pools of honey or condensed milk floating on top of your liquid mixture.
Step 3: Pour in vegetable oil and add sesame seeds
Next, pour your selected quantity of neutral vegetable oil (200‑250g) slowly into your sweet egg mixture. Stir vigorously and continuously to combine oil with the water‑based egg‑milk blend until your glaze becomes fully smooth and well‑emulsified. Once your liquid base is ready, toss in your handful of mixed black and white sesame seeds and stir once more to distribute sesame seeds evenly throughout the whole glaze. Mixing sesame seeds straight into the liquid coating guarantees that sesame particles stick consistently onto every bread slice, instead of falling off after brushing.
Step 4: Brush your plain bread slices thoroughly
Lay out your white sandwich bread slices on a flat countertop. Dip your silicone pastry brush deep inside your finished toast glaze mixture. Brush a generous, even coating of the liquid all over the top side of one bread slice. Then flip your toast slice over and coat the reverse side completely. Remember to paint glaze onto the four outer edges and crust corners of each slice. Crust areas easily dry out during baking, so extra coating will keep your crust soft‑edged and golden. Repeat this brushing process for every slice of bread you want to bake.
Step 5: Bake your toast until golden brown
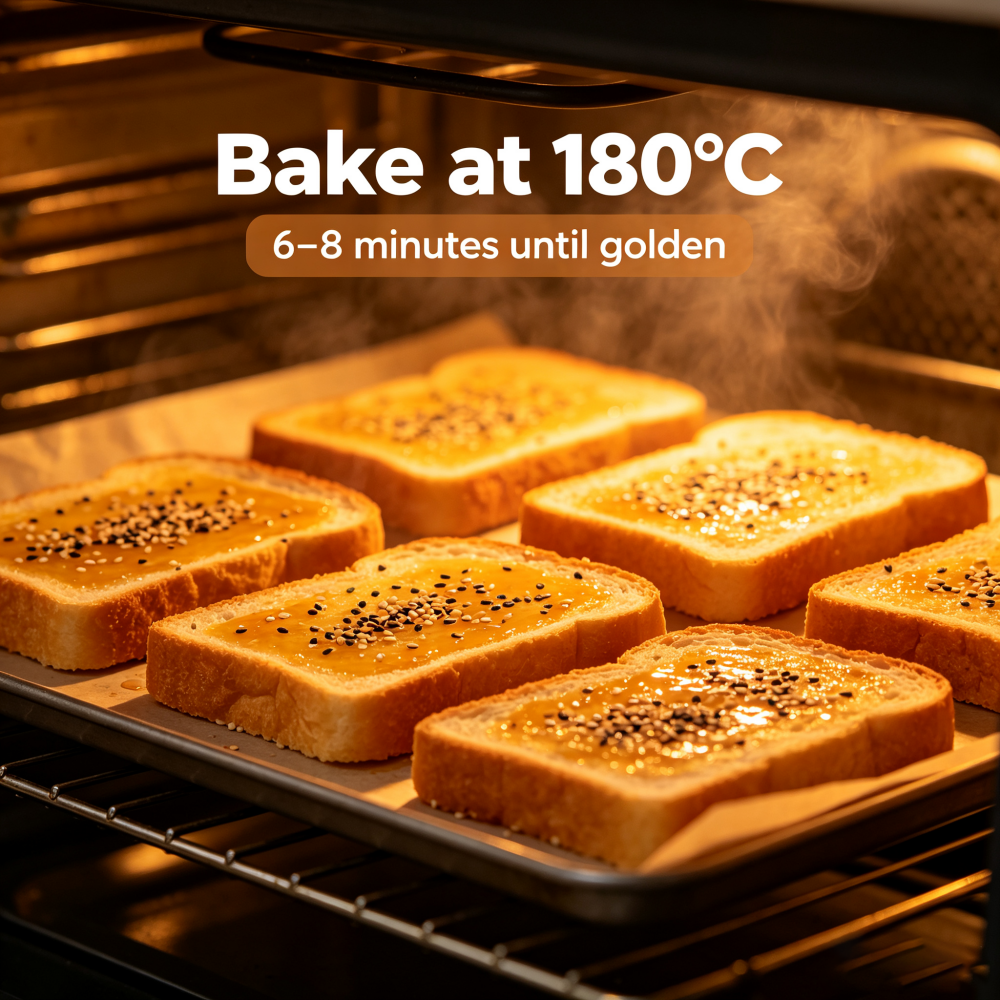
Place all your freshly glazed bread slices onto your wire baking rack. Leave small gaps between slices so hot air can flow freely. Pre‑heat your oven or air‑fryer to 180°C, then bake for 6‑8 minutes. Watch your toast closely while baking. Your finished toast is ready when both sides turn bright golden yellow and the outer edges become slightly caramelized and crisp. Cooking time varies from device to device. If your oven runs hotter or cooler than standard, shorten or extend baking minutes accordingly to avoid burnt toast.
Step 6: Store semi‑finished glazed toast for later use
One of the most useful features of this recipe is the option to prepare semi‑finished glazed toast ahead of schedule. Once you finish brushing glaze onto your bread slices but before you bake them, you can wrap each slice tightly with food‑safe plastic wrap. You can store wrapped slices inside your refrigerator and bake them on the same day, or place them into freezer‑safe bags for long‑term frozen storage. When you want to eat your pre‑prepared toast, simply take frozen slices out, let them warm up slightly at room temperature, then put them straight in the oven to bake. This meal‑prep trick drastically cuts morning breakfast cooking time on busy weekdays.
Professional Pro Tips to Perfect Your Baked Sesame Toast
After testing this homemade toast glaze recipe many times, there are several simple tricks that greatly improve your final flavor and texture:
- Mix sesame seeds into your glaze liquid, do not sprinkle sesame seeds on top after brushing. When sesame seeds are stirred into the wet coating mixture, they stick far more reliably onto bread, and you get consistent sesame flavor across every bite of toast.
- Adjust vegetable‑oil amounts for different mouth‑feel outcomes. Choosing 200g oil creates lighter, fresher baked toast with less oily finish. Selecting 250g oil delivers richer, juicier, more fragrant toast, ideal for anyone who loves a deeply indulgent bakery‑style snack.
- Watch carefully for visual baking cues. The perfect finished toast color is warm golden yellow, with lightly toasted, caramel‑brown edges. This stage balances crispy outer crust and tender, soft inner bread texture. If you bake beyond this point, your toast will turn overly hard or burnt.
- Customize your glaze flavor. This base recipe creates classic original‑flavor baked toast. Once you master the fundamental glaze mixture, you can experiment with small‑batch flavor variations, adding cocoa powder for chocolate toast, matcha powder for green‑tea flavored toast or cinnamon powder for spiced breakfast toast.
- Bread thickness matters. Thicker‑cut sandwich bread holds more glaze liquid and stays softer inside after baking, while thinner slices crisp up faster and need shorter baking time.
Final Thoughts
This simple, creamy homemade toast glaze recipe unlocks endless possibilities for quick, tasty home‑baked sesame toast. With just basic eggs, honey, condensed milk, oil and sesame seeds, you can transform cheap, ordinary sliced bread into an impressive, crowd‑pleasing snack that tastes like bakery‑baked goods. The short 10‑minute preparation time, flexible baking equipment compatibility and convenient make‑ahead frozen semi‑finished storage method make this recipe ideal for busy parents, office workers, home baking hobbyists and breakfast lovers of all ages. Once you try this milky, golden baked sesame toast, it will very likely become a regular staple in your weekly breakfast rotation.